If you are looking for a way to Install TWRP recovery on your Nothing Phone 1, then this guide is for you. In this guide, we will show you how to install TWRP recovery on your Nothing Phone 1 using a computer. We will also show you how to root your device using TWRP recovery.
Now before installing TWRP you must take a few precautions before doing so. First and foremost, make sure you take a complete backup of your phone’s data.
This includes everything from your contacts to your photos and videos. Secondly, be sure to fully charge your phone before starting the process. This will help ensure that there are no interruptions during the installation process.
Finally, make sure you have a working internet connection, as you’ll need it to download the necessary files.
Page Contents
About Nothing Phone 1
Let’s have a quick look at the key specifications of the Nothing Phone 1.
- This phone comes with a 6.55 inches Full HD Plus OLED display protected by Corning Gorilla Glass 5.
- Nothing Phone 1 has a Snapdragon 778G+ 5G chipset. It’s an Octa-core CPU
- We are getting Nothing OS on top of Android 12.
- It has 12 GB of RAM and 256 GB of Internal Storage.
- Talking about the Camera, we get a Dual Rear-facing camera of 50 MP + 50 MP and a 16 MP Selfie Camera.
- Nothing Phone 1 comes with a Non-removable 4500 mAh battery which also supports Fast charging at 33W.
- This device comes with all the required sensors including Fingerprint (under display, optical), accelerometer, proximity, gyro, and compass.
Must Read: Install Stock ROM on Nothing Phone 1
What is TWRP Recovery?
TWRP Recovery stands for TeamWin Recovery, it’s a Custom Recovery that helps to install third-party firmware, custom ROM, and flashing zip files. TWRP gives more features than what you get in Stock Recovery. It’s a touchscreen-based interface that makes the flashing process very easy.
Now before moving to the steps let’s discuss some of the advantages and disadvantages of installing TWRP custom recovery on your smartphone.
Advantages of Installing TWRP Recovery on the Nothing Phone 1?
- You can easily Root your Nothing Phone 1 smartphone.
- Once you install TWRP, you can Hard Reset or Wipe your smartphone.
- You can update your phone to the latest Android OS.
- Taking Backup up your Android becomes straightforward.
- You can install ZIP files or Install Custom ROM on your phone.
Must Read – Various Issues on the Nothing Phone 1 & How to Fix Them
Disadvantages of Installing TWRP Recovery on the Nothing Phone 1?
- Your phone warranty gets void.
- If you flash wrong files or unstable files then your phone will be Bricked.
- You may face some performance issues after installing TWRP.
- Flashing Unstable ROM to Nothing Phone 1 can make your phone unfunctional.
- You will not get OTA updates from your phone manufacturer.
Related Article: Root Nothing Phone 1
Let’s Install TWRP Recovery on the Nothing Phone 1
So, to install TWRP you need to make sure that you have followed the pre-requirements shown below:
Prerequisite
- Download TWRP Recovery Img file to your PC and Rename it to TWRP.img.
- You will need a Laptop or PC for this method.
- Fully charge your Nothing Phone 1.
- Make sure to Unlock Bootloader On Nothing Phone 1.
- Take a complete backup of your Android. It will help you to restore files if anything goes wrong.
- This method is only for the Nothing Phone 1 smartphone. Please do not try this method on any other smartphone. Otherwise, it will Brick your phone.
Warning: All the tutorials/ guides shown in this blog are not tested for each and every smartphone. As the method of installing TWRP Recovery is almost the same for every smartphone.
If anything happens to your smartphone RootingSteps.com is not responsible for loss and damage to your smartphone. Try these methods with your own risk!
Steps To Install TWRP Recovery on Nothing Phone 1:
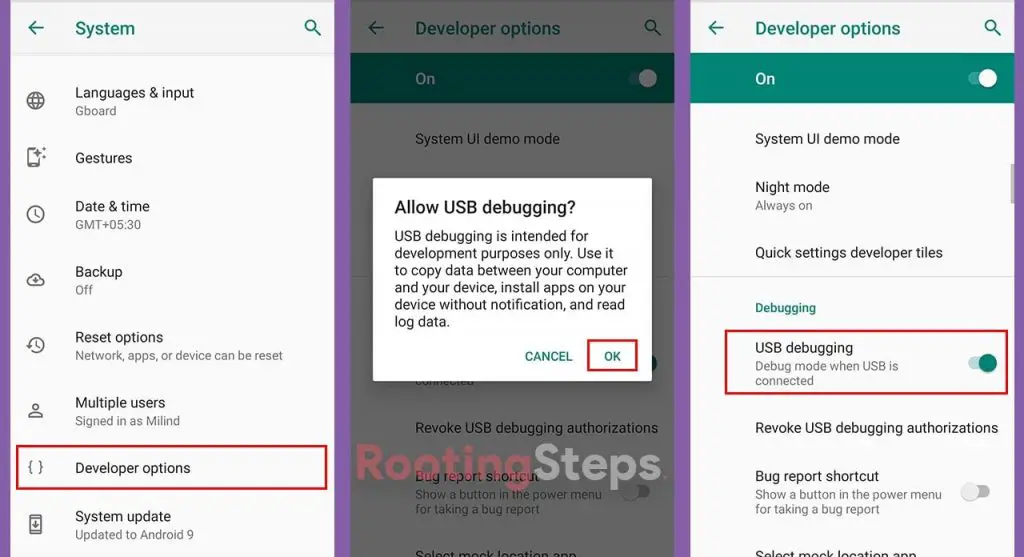
1. First Enable USB Debugging on your Nothing Phone 1. Go To Setting >> About >> Software >> Build Number and Tap on build 6-7 Times so that Developer mode will turn on.
2. After that, Go Back to Settings Tab and Go to Developer Options,>>, and Enable USB Debugging option.
3. Once done now you need to Setup ADB and Fastboot on your Windows or PC. Follow the steps shown below.
- Download ADB and Fastboot Tool
- Extract It and Run It
- Next Press Y/Yes to install ADB and Fastboot or N/No to skip
- Press Y/Yes to install ADB system-wide or N/No for current users only
- Again Press Y/Yes to install Drivers or N/No to skip
- Continue Driver installation
Source: xda-developers.com
4. Connect Your Nothing Phone 1 to PC via the original USB Cable.
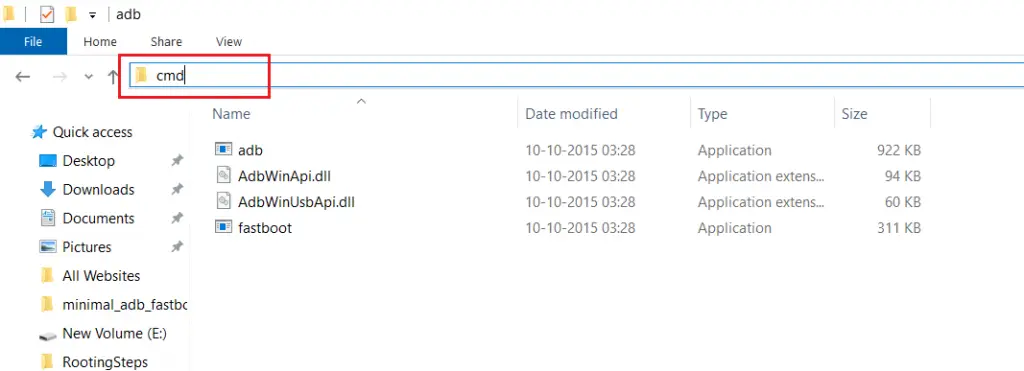
5. Open the ADB folder which will be located in this location C:\adb.
6. Move TWRP.img file to ADB Folder.
7. Now open CMD by typing “cmd” on Address Bar and Hit Enter as shown in the screenshot below.
8. Once done on the Command Window type the following commands.
adb reboot bootloader
- Hit Enter, this command will Reboot your Nothing Phone 1 to Bootloader Mode. Now type
fastboot devices
- Hit Enter, this command will ensure that your phone is properly connected to pc or not.
fastboot flash recovery twrp.img
- Wait till the flashing process completes. Once done type the below command.
fastboot reboot
9. Now your Nothing Phone 1 smartphone will Reboot.
10. Congrats 🙂 You have successfully installed TWRP Recovery on Nothing Phone 1.
Related: How to Install Custom ROM on Nothing Phone 1. (Custom ROM File May Or May Not Be available as per the development)
Now you have Install TWRP on your phone, you can easily Root your Nothing Phone 1.
Related article: Unroot Nothing Phone 1
So, I have shown you the complete steps of installing TWRP Recovery. I hope this guide helps you to Install TWRP Recovery on the Nothing Phone 1, Make sure to leave a comment if this method works for you.
Also, share your valuable feedback and queries in the comment section. I will try my best to solve all your queries of yours as soon as possible.
See you in the next guide 🙂 Cheers