Today, in this guide, I will show you how to Install Custom ROM on Samsung Galaxy A32 smartphone. In this article, I have shown you the easiest method to install a Custom ROM using TWRP Recovery. The steps are very simple and straightforward. You need to follow every step carefully.
Page Contents
What is Custom ROM?
A Custom ROM is an unofficial version of the OS which is developed by the community and developers. In Custom ROM, the developers add extra new features that are not found in Stock ROM.
Android is an open-source OS by Google, so the developers take the source code, and they do countless customizations to make the ROM the best.
As this Android ROM is custom made, that’s why it is known as Custom ROM or Custom Firmware. The best part of the Custom ROM is that it allows you to experience the latest Android OS even if the most recent OS is not available for your device.
Must Read: Install Stock ROM on Samsung Galaxy A32
Advantages of installing Custom ROM on the Samsung Galaxy A32 device
If you want to know what are the benefits of installing Custom ROM, then here are some of the top advantages:
- You can enjoy the latest Android OS, without waiting for OTA.
- By installing Custom ROM, you will get rid of Bloatware.
- You will get rid of Ads.
- Custom ROM gives you extra features along with a new user interface.
- You can Modify the Look of your Android. Customize it as you like.
- It will provide you with a Unique Experience.
Must Read – Various Issues on the Samsung Galaxy A32 & How to Fix Them
Disadvantages of installing Custom ROM on the Samsung Galaxy A32 Phone
The above points are tempting right, but there are various disadvantages that you must know before installing Custom ROM:
- Installing, a Custom ROM will void your warranty.
- There are chances of bricking your device.
- If you install, Unstable ROM may affect device performance.
- An Unstable ROM will impact the performance of the phone.
- You cannot use Banking Apps like PayPal, Payoneer, etc.
- There is a Privacy Issue in Custom ROM as third-party developers develop it. But you can always trust XDA Developers for downloading Custom ROM.
Let’s Install Custom ROM On the Samsung Galaxy A32
Things to remember before you’re installing Custom ROM on the Samsung Galaxy A32 Phone:
- Make sure to Unlock Bootloader on Samsung Galaxy A32.
- You need to have TWRP Recovery on Samsung Galaxy A32. Without TWRP, you cannot flash Custom ROM to your Samsung Galaxy A32 smartphone.
- Moreover, fully charge your phone.
- You need to Root your Samsung Galaxy A32 smartphone.
- Take a full backup of your Android, as installing Custom ROM will erase all your data.
- This method is only for the Samsung Galaxy A32 smartphone. Please do not try this method on any other smartphone. Otherwise, it will brick your phone.
Disclaimer: All the tutorials/ guides shown in this blog are not tested for each and every smartphone. As the method of installing Custom ROM is almost the same for every smartphone.
If anything happens to your smartphone RootingSteps.com is not responsible for loss and damage to your smartphone. Try these methods with your own risk!
Steps To Install Custom ROM on Samsung Galaxy A32
- First Download Custom ROM for your Samsung Galaxy A32. You can download ROM by Google Search.
- Move the ROM file to your device’s Internal Storage.
- Once done, Boot your Samsung Galaxy A32 to recovery mode by holding the Volume Up Plus Power Button for 5 seconds.
- Now, you should see something like this.
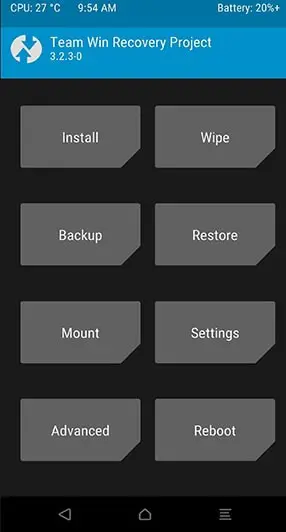
- Now, let’s flash the ROM. Follow the below steps:
- Go to Install.
- Locate the ROM that you have just downloaded.
- Select the ROM
- And “Swipe To Confirm Flash”.
- After the installation process completes, clear your cache. Select Dalvik cache and Cache.
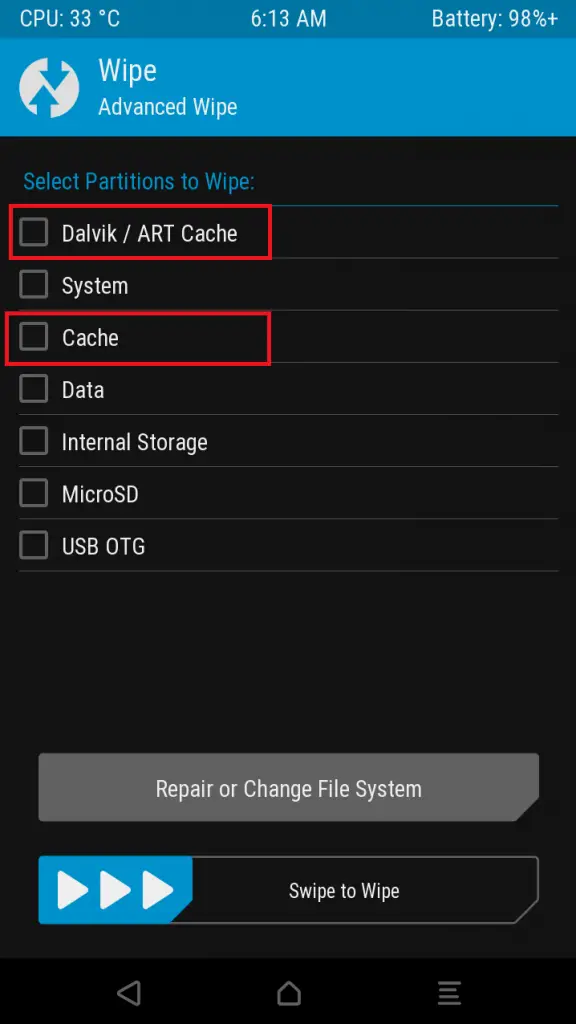
- Then, “Swipe To Wipe.”
- Now let’s Install Gapps. Follow the below steps:
- Download Gapps package
- Go to Install
- Locate the GApps package that you have just downloaded.
- Select the file
- And “Swipe To Confirm Flash”
- Finally, reboot your Samsung Galaxy A32 device.
- That’s it. You have successfully Install Custom ROM on Samsung Galaxy A32.
The first Boot may take 5–10 minutes, so please don’t panic. Do not touch your phone until it boots up. Otherwise, it may brick your device.
Related Article: Unroot Samsung Galaxy A32
Conclusion
So, this was the complete step-by-step guide to Install Custom ROM. I hope this guide helps you to Install Custom ROM on Samsung Galaxy A32, make sure to leave a comment if this method works for you.
Furthermore, share your valuable feedback and queries in the comment section. I will try my best to solve all the queries of yours as soon as possible.
See you in the next guide.