There are many reasons why you might want to Root your Asus phone. Maybe you want to get rid of bloatware that came pre-installed on your device, or maybe you want to install a custom ROM that isn’t available on your phone’s stock firmware. Whatever your reasons, there are a few different ways to root Asus phones.
In this article, we’ll show you six different methods to root Asus phones. Some of these methods are easier than others, so you’ll need to decide which one is right for you.
Before we get started, there are a few things you should know. Rooting voids your warranty, and it’s possible to brick your phone if you don’t know what you’re doing. Rooting also gives you access to features and settings that could potentially damage your phone if you’re not careful.
With that said, let’s get started.
Page Contents
- 0.1 What is Rooting?
- 0.2 Advantages and Disadvantages of Rooting
- 0.3 Specific Rooting Guide For All Asus Devices
- 0.4 Things to be done before Rooting Asus Phone
- 1 Steps To Root Any Asus Phone in 2024
- 1.1 Root Asus Device By Magisk: METHOD 1
- 1.2 Root Asus Device via PC: METHOD 2
- 1.3 Root Asus Device By SuperSU: METHOD 3
- 1.4 Root Asus Device via KingoRoot App: METHOD 4
- 1.5 Root Asus Device By iRoot PC: METHOD 5
- 1.6 Root Asus Device By PC: METHOD 6
- 1.7 How to Check if Your Asus Device Is Rooted or Not?
- 1.8 Conclusion
What is Rooting?
Rooting your Android phone or tablet gives you complete control over the system, and that power can be a heady thing. After all, with root access, you can do just about anything you want on the phone.
You can install any app, even those that are considered “incompatible” with your device. You can overclock or underclock the processor, tweak the battery settings, and even change the way the phone looks with a custom ROM.
But with great power comes great responsibility. Rooting can void your warranty, and there’s always the potential to brick your device if things go wrong.
Still, if you’re willing to take the risk, rooting is a great way to unlock the full potential of your Android device. And thanks to tools like Magisk, it’s easier than ever to do.
Advantages and Disadvantages of Rooting
Rooting your phone can be a controversial topic. Some people swear by it, while others think it’s a terrible idea. So, what are the advantages and disadvantages of rooting? Let’s take a look.
One of the main advantages of rooting is that it allows you to customize your phone to a much greater extent than is possible with a non-rooted phone. You can install custom ROMs, kernels, and mods that give you features that you could never have on a stock phone. You can also overclock or underclock your processor, depending on your needs.
Another advantage of rooting is that it gives you access to certain apps that are only available on rooted phones. These apps can do things like backup your system, tweak your settings, and more.
However, there are also some disadvantages to rooting. One of the biggest is that it voids your warranty. If you root your phone and something goes wrong, you can’t take it back to the store and get it fixed for free. Additionally, rooting can also make your phone more vulnerable to malware and other security threats. So, you need to be careful what you install on your rooted phone.
Overall, rooting is a decision that you need to make based on your own needs and preferences. If you want to be able to customize your phone to a greater extent, then rooting is probably a good idea. But if you’re worried about voiding your warranty or increasing your security risks, then you might want to stick with a non-rooted phone.
Specific Rooting Guide For All Asus Devices
Things to be done before Rooting Asus Phone
Before rooting your Asus phone, there are a few things you need to do in order to make the process as smooth and successful as possible.
- Make sure to Unlock the Bootloader On Asus Device. This step is essential; without unlocking, you cannot Root your phone.
- You need to Install TWRP Recovery On Asus Device. (NOTE:- TWRP File May Or May Not Be available as per the development)
- Before Rooting, make sure that your Asus Device has more than 75% of its Battery available.
- Make sure to Take a complete backup of your android. Having a backup will help you restore important files if you lose them.
- This method is only for the Asus Device smartphone. Please do not try this method on any other smartphone. Otherwise, it will Brick your phone.
Steps To Root Any Asus Phone in 2024

Warning: All the tutorials/ guides shown in this blog are not tested for each and every smartphone. As the Rooting process is almost the same for every smartphone.
If anything happens to your smartphone RootingSteps.com is not responsible for loss and damage to your smartphone. Try these methods with your own risk!
Root Asus Device By Magisk: METHOD 1
Success Rate: 99%
- Download Magisk Zip file and save it to your phone’s internal storage.
- Now Boot Asus Device into Recovery Mode by pressing the Volume Up + Power Button simultaneously.
- You will see the TWRP screen.
- Go to Install → Select the Magisk Zip file → Swipe to Install.
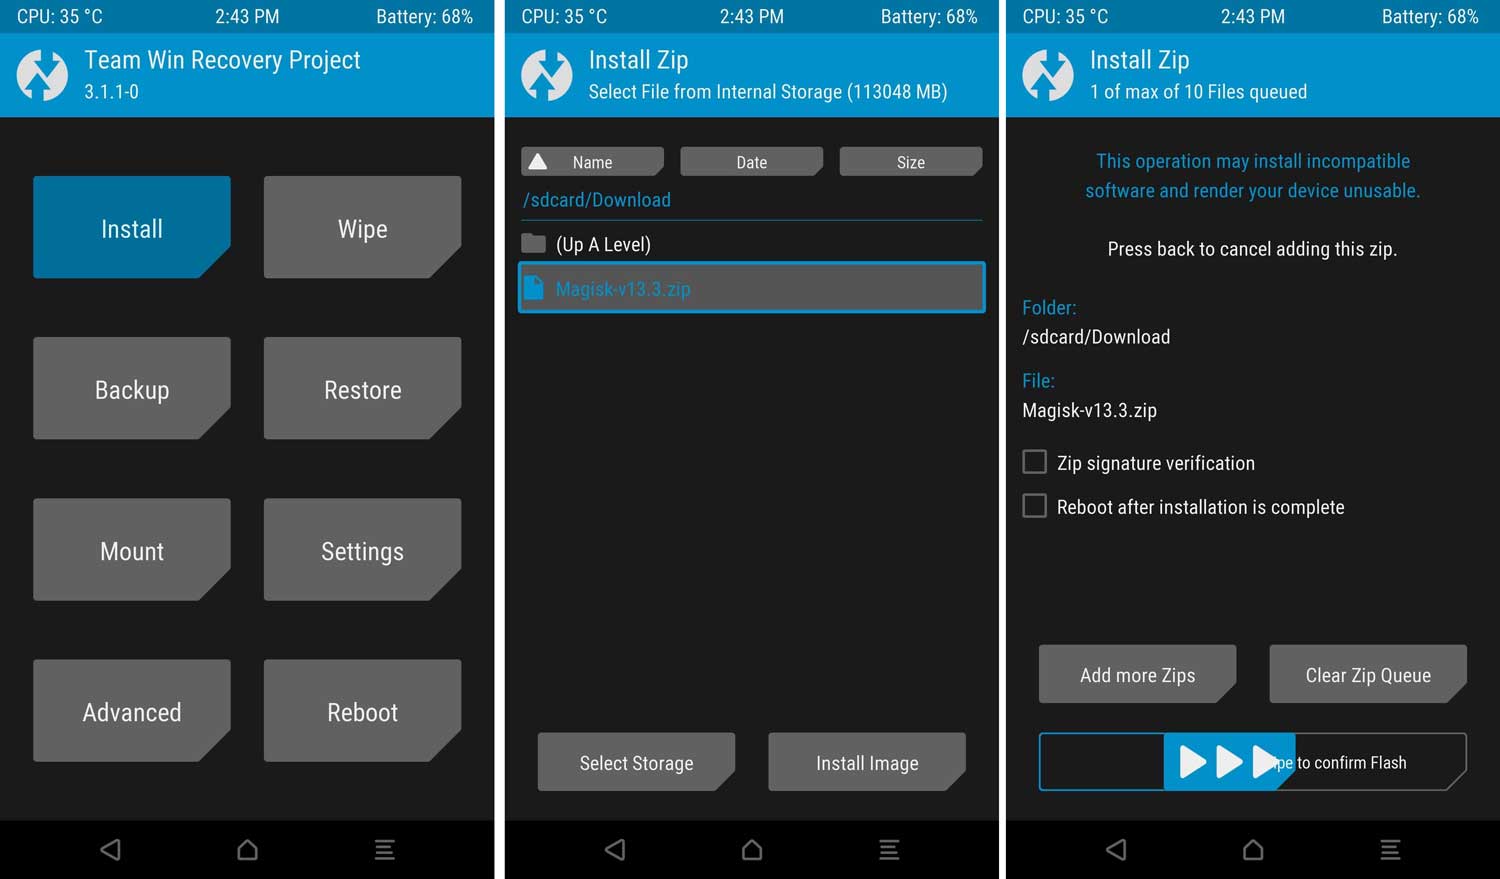
- Wait till the flashing process completes.
- After that, Reboot your device.
- That’s it. Your Asus Device has been Rooted successfully.
Once your device boots up, you will see the Magisk App in the apps menu. This app is very convenient for managing root permissions, installing modules, updating the app, etc.
RELATED – How to Install Custom ROM on Asus Device. (Custom ROM File May Or May Not Be available as per the development)
Root Asus Device via PC: METHOD 2
Success Rate: 99%
- First off, visit OneClickRoot’s official site.
- Select Asus from the list.
- Enter your Asus Device device model.
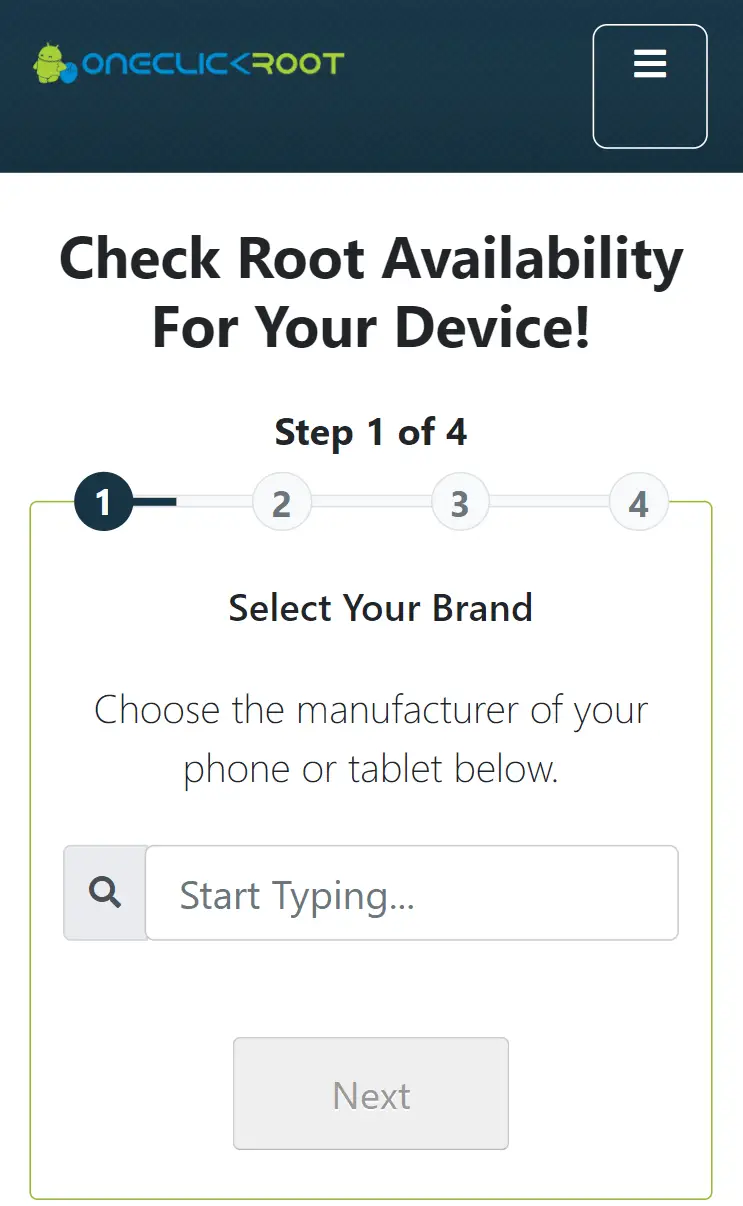
- Choose your Android version from the list and click on Next.
- Furthermore, click on Verify Device Rootable button.
- You will see this message “Success, your device is rootable!”.
- Click on Purchase Now button to complete the checkout.
- Congratulations, you have successfully Rooted your Asus Device.
Root Asus Device By SuperSU: METHOD 3
Success Rate: 95%
This SuperSU method is the most used Rooting method. We need TWRP Recovery or any Custom Recovery installed on your Asus Device smartphone for this method.
- First, download SuperSU Zip and save it to your Asus Device’s internal storage.
- Power off your phone and boot into Recovery Mode by pressing Volume Up Button + Power Button at the same time.
- You will see the TWRP screen.
- Go to Install → Select the SuperSU Zip File → Swipe to Install.
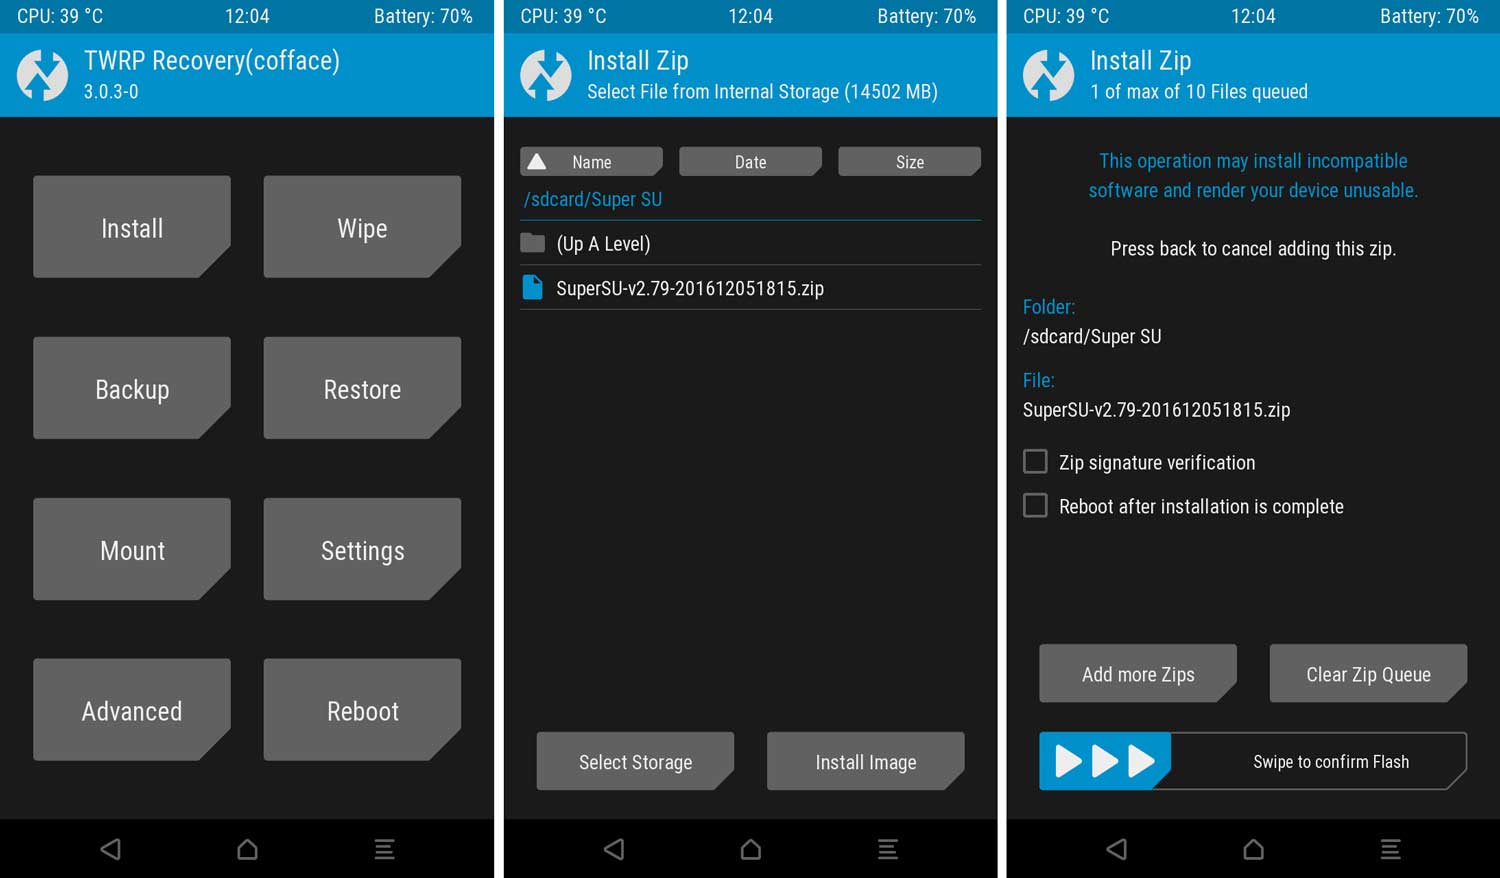
- Once done, Reboot your phone.
- Well Done! You have successfully Rooted your Asus Device.
After your phone Reboots, you will see the SuperSU app on your apps menu. With the help of the superuser app, you can remove Root access anytime you want.
NEXT – How to Unroot Asus Device
Root Asus Device via KingoRoot App: METHOD 4
Success Rate: 85%
- First, download KingoRoot App and Install it on Asus Device.
- Make sure to enable the “Unknown Sources” option.
- Open the App and Tap on One Click Root, then tap confirm.
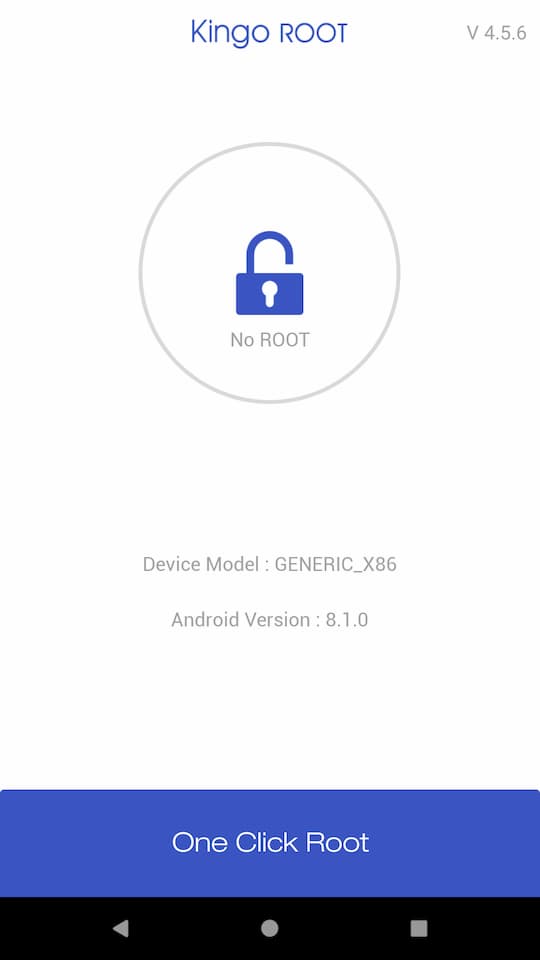
- Let the Rooting process complete.
- If you get any errors, you must check that you have a Strong Internet Connection.
- Well, that’s it. Your Asus Device has root access now.
MUST READ – Install Stock ROM on Asus Device
Root Asus Device By iRoot PC: METHOD 5
Success Rate: 80%
- First, download iRoot PC Software and Install it.
- Enable USB Debugging on Asus Device.
- To do that, Go to Setting → Developer options → Enable USB Debugging.
- Connect your Smartphone to your PC via USB cable.
- On your computer’s screen, click on the Connect device.
- Install the driver for Asus Device. (Check on the manufacturer’s website)
- Once your device is detected, click Root to begin rooting.
- Your device will restart after getting rooted.
- If you get any error messages, then check your Internet Connectivity.
- Congratulations! you have rooted the Asus Device.
Root Asus Device By PC: METHOD 6
Success Rate: 90%
- Download and install Dr.fone for PC.
- Enable USB Debugging on Asus Device.
- To do that, Go to Setting → Developer options → Enable USB Debugging.
- Connect your phone to a PC/Laptop via the original USB cable.
- Furthermore, make sure you have a strong Internet Connection.
- After your phone is connected, click Start; the program will find your device and prepare a way to root your phone.
- Click on Root Now to begin rooting your phone.
- Before the rooting process, the phone will ask if you would like to root the phone.
- Tap on Confirm to continue the rooting.
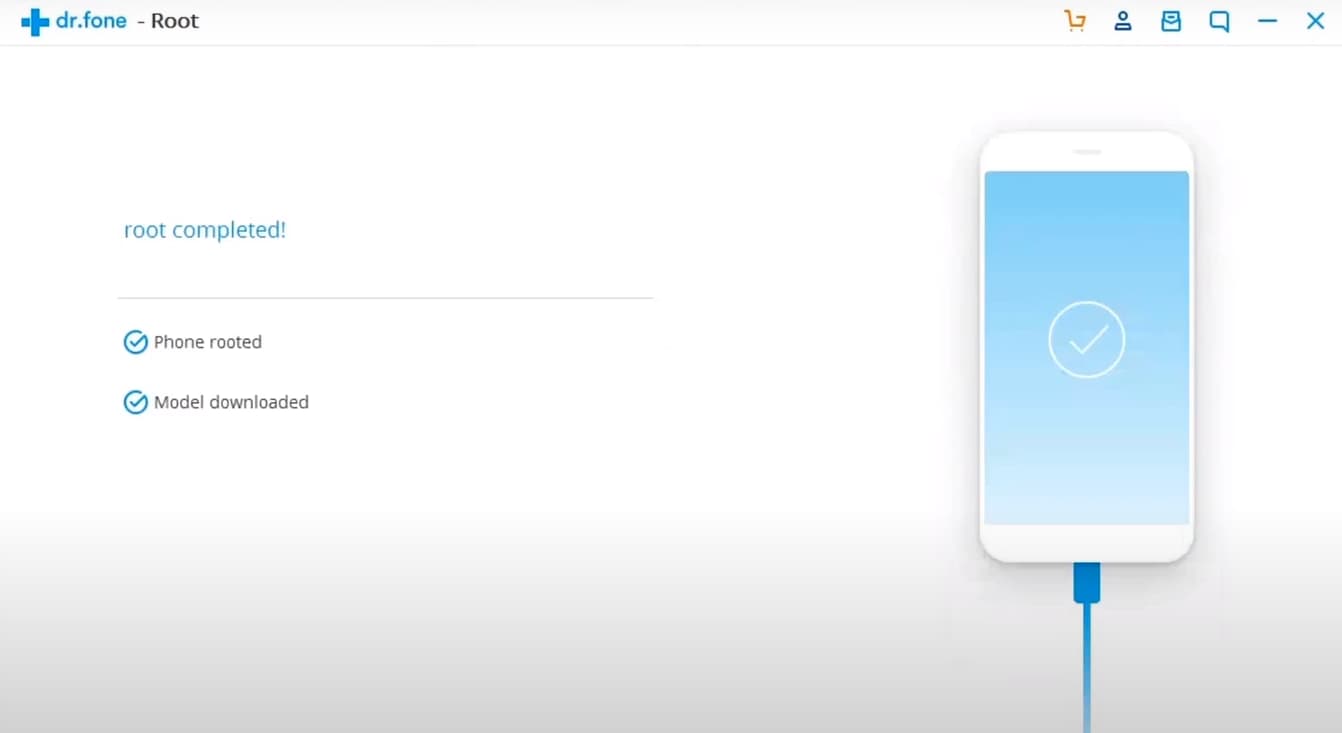
- Congratulations! You have successfully Rooted your Asus Device.
If the above method doesn’t work for you, try the below methods.
How to Check if Your Asus Device Is Rooted or Not?
- Download and install Root Checker App.
- Open the app.
- Click on the Verify Root option.
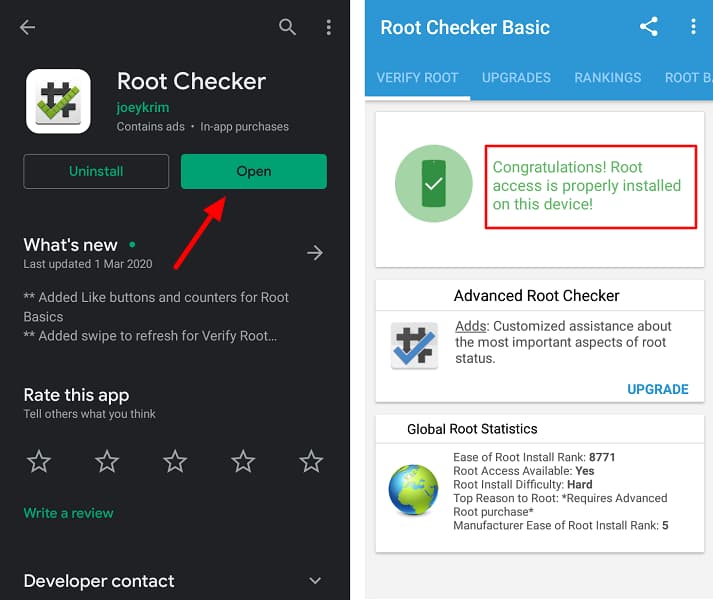
- If your device is rooted successfully, you will get this message “Congratulations! Root Access properly installed on this device”.
Conclusion
In conclusion, there are a few different ways that you can go about Rooting your Asus phone. You can use either a one-click root method or a manual root method, depending on your preference.
If you’re not sure which method to use, we recommend trying a one-click root method first. Whichever method you choose, make sure to follow the instructions carefully to avoid bricking your phone.